…guest post by Karen, our tile and coping specialist
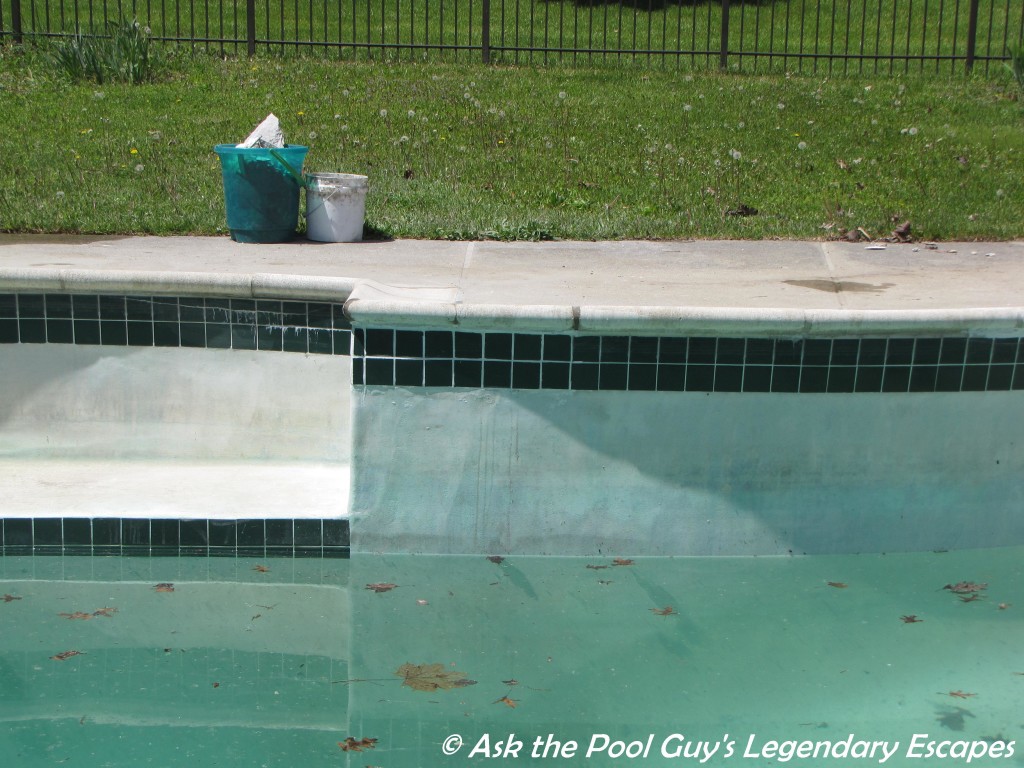
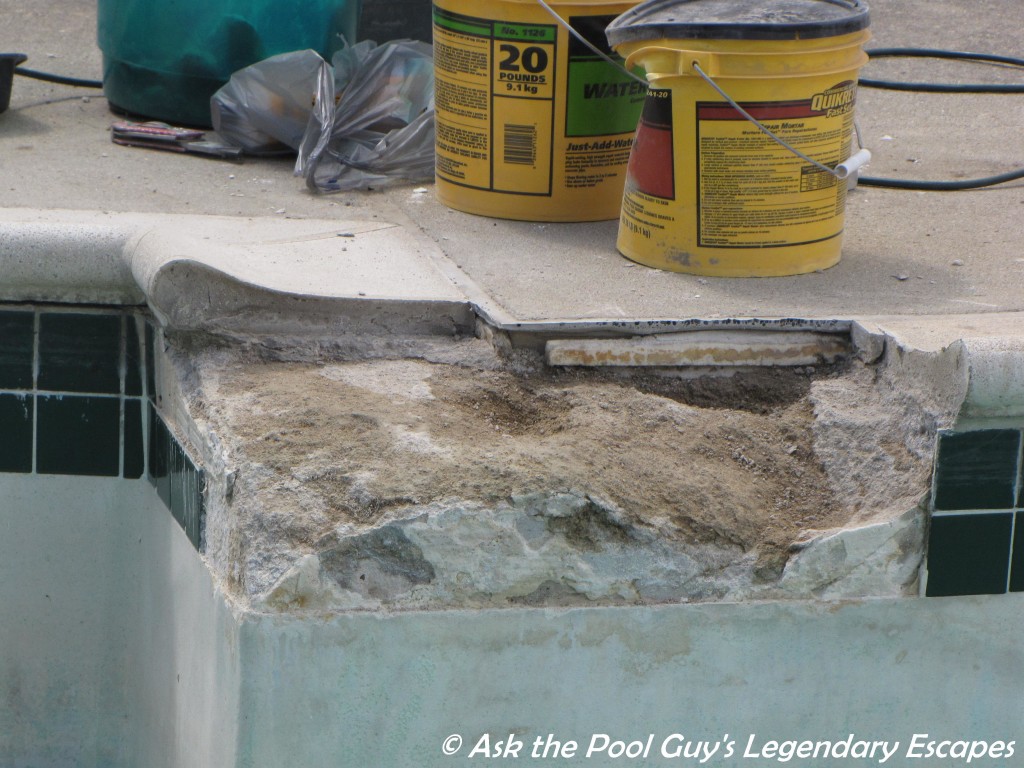
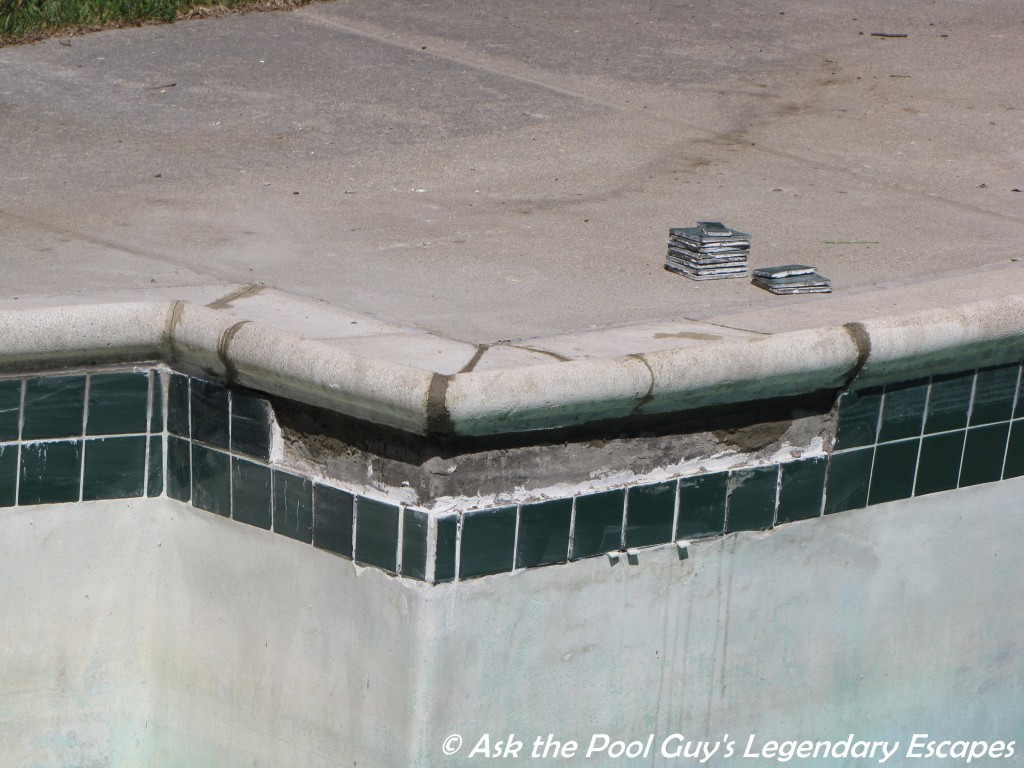
I recently went to do a tile repair where I was told about four, maybe five, feet of tile was missing. When I asked how the pool wall looked where the tile were missing, I was told there was cracking and a chunk or two of gunite missing. This wasn’t surprising as older pools can develop what is called “beam shear”.
When a pool shell is shot some gunite companies shoot and shape the walls, shallow end, and hopper (deep end), then they come back and top off the walls with an inch or so more of gunite. This new layer is added to drying gunite so the adhesion isn’t always as strong as it would be if the walls were shot as one unit. Eventually, with age, and Michigan’s winters, the added layer cracks, and tiles, which border the pool right where the two layers meet, become innocent victims.
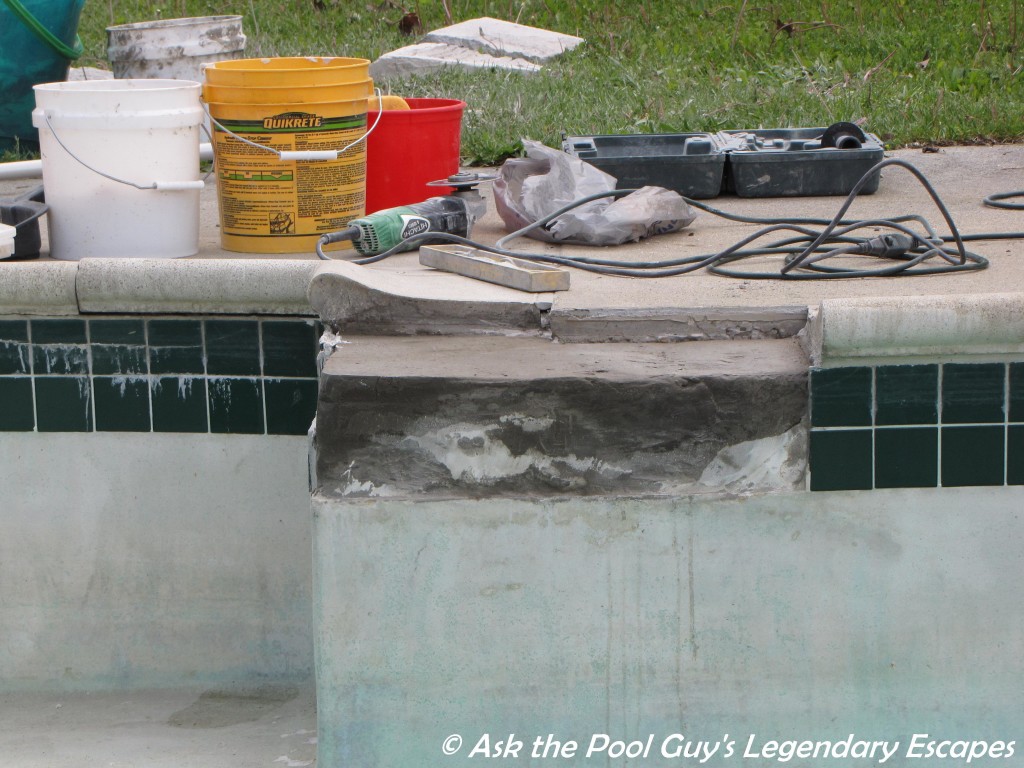
Heading to this repair knowing I would be dealing with a significant crack, I had the materials necessary to pack the crack, because there isn’t much else you can do with beam shear, and replace the tile. When I arrived, the repair looked simple enough, until I got close and realized I was also dealing with loose coping stones. When I started removing crumbling gunite from the crack, large chunks came out . When I finally finished clearing away all the loose debris, reaching something stable I could start my repair on, I had removed two loose coping stones and half the beam I needed to reapply the tile on. I had masonry cement to fix the crack, but needed stronger cement, and more of it, to rebuild the beam. So off to Lowes I went to buy a bonding agent and hydraulic cement.
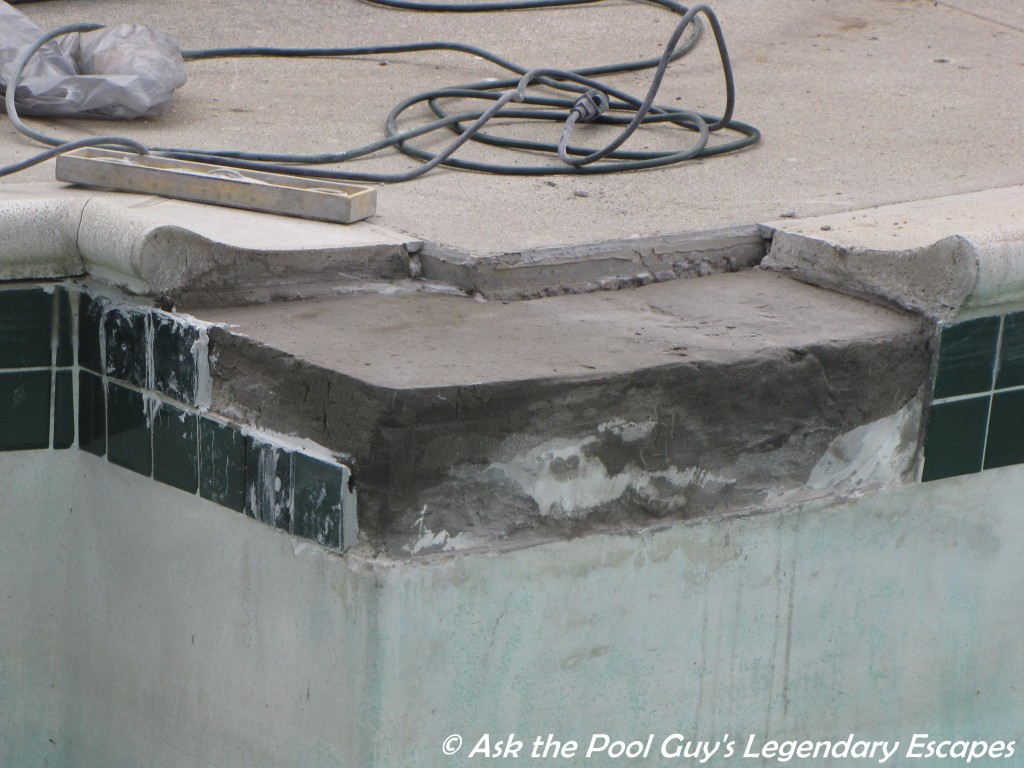
I started the repair by spreading the bonding agent on the area where I would apply the new cement. Mixing the cement with water and bonding glue, I pressed it into the area I needed to build up until I knew I was high enough to re-level the removed coping stones with the existing ones, but before I could set them I had to shape the beam. Hydraulic cement hardens quickly so it wasn’t long before I could carve smooth the top and side of the new beam, creating a 90 degree angle where the tile would meet the coping stone. I was able to set the lower row of missing tile where the beam hadn’t crumbled, this would make setting the top row easier in the morning, after letting the new cement to cure overnight.
Returning, I reset the coping stones on a sturdy surface, reapplied the top row of tile on a solid wall, grouted, cleaned up, and was done. The customer asked me on the 1 to 10 scale where I thought this repair might land. I told him maybe a 7? As someone who enjoys sculpting, rebuilding the beam wasn’t that intimidating. The lesson learned here was to always be prepared for the unexpected. 